Showing posts with label Review: Nails. Show all posts

Friday, June 17, 2011

NOTW: 2011-05-18

Nail of the Week
May 18, 2011
(I know the dates aren't showing up literally weekly, but I use the date when I either do them or when I upload the pictures from my camera)

Was a little bored, and tried to use a different technique this time.


What I used:
- OPI - Navy Blue (not sure about color#/name)
- Wet n Wild - 469 Hallucinate (clear with silver glitter)
- OPI - Rapid dry top coat
- Sponge, cut from a foundation sponge

 I'm going to write this quick since I'm getting sleepy.
I used the sponge and dabbed it on my nail tips to get a bit of a gradient look.  They also go above the smile line.  To make the blue a little darker, I applied a bit more polish at the tips using the brush which really did help in the gradient effect.  When the color dried, I applied the glitter polish over it, just one coat and then applied a top coat after it dried.

These nails lasted for about 2 weeks before the chipping of the polish got really bad. 
As much as I like the Rapid dry top coat that OPI has, I find that it works more like a clear layer of polish rather than protecting it.  Polish tends to peel off when I use that top coat. and when I mean peel, i mean PEEL. like, I can peel off the entire nail color without it chipping or ripping.

I really liked these nails, and I'm glad they lasted as long as they did.  I just wish that the top coat wasn't as bad as it is.


*Currently, my nails have been naked since this last look.  My nails are very brittle right now, not sure why since I havent had a problem before.  They've been peeling, usually it'd only be one of my nails, but a few of them have been peeling.  So not only are my nails naked, they are also short.  I don't usually like doing one color polishes (which I've said before), but since I got those new eLF polishes, I might as well try it out.

Monday, April 18, 2011

NOTW: 2011-04-13

Nail of the Week
April 13, 2011
(I know the dates aren't showing up literally weekly, but I use the date when I either do them or when I upload the pictures from my camera)


It's the time for Cherry Blossoms to bloom and what's a great way to celebrate but to do some nail art of cherry blossoms~ (and YES my NOTW have actually caught up!)


What I used:
- N.Y.C In a New York Minute Quick Dry Nail Polish - 212 Mulberry Street
- N.Y.C In a New York Minute Quick Dry Nail Polish - 234 Wall Street
- Milani Nail Art (with precision brush) in Black Sketch and White Canvas
- Toothpicks


(Left: Wall Street (pink), Right: Mulberry Street (nude/tan))
I just bought these from Target last week (literally last week lol) just to be able to do these nails.  I wanted some inexpensive nail polish since I'm not a big fan of pink and went straight for NYC.  I was looking through the 99cent polishes but couldn't find a nice pink color.  I noticed that NYC had a new collection of quick drying polishes for about $1.99 and decided to give it a go.  I'm not particularly fond in using NYC since they do only last about a day or two and then begin to chip, but I was pleasantly surprised at how nice these were.

Let's start with Mulberry Street.  The color is this shiny, nude, almost tan color which I was drawn to when I was looking through the collection.  The color comes out way nicer than the bottle appears.  One coat wasn't enough to cover the entire nail completely but a 2nd coat did the job, but I applied a 3rd coat for maximum color.  The only problem was that because I used 3 coats, it took longer than a minute to dry, but they do dry quick.  I absolutely love this color and am certainly going to use this often as a base color for some of the art, but also as just a put on and go polish when I don't feel like doing anything special.
Wall Street is a nice pink shade, but I would never use it as a full nail color, probably not even for the tips either.  Like I said, I'm not a big fan of pink, but I wouldn't mind wearing it as long as it was the right shade of pink for my liking.  I'm not particular of this shade, but wouldnt mind using it for flowers or accents.  I used this pink as the petals for cherry blossoms and it took more than one dot to apply to get the color to show.  If I were to apply these to my natural nail, they probably would be barely visible so it's a good thing I had a base color for it to show.  Definitely not going to use this color aside from small details.


So how I did my nails was apply the Mulberry Street color as the base, allowed it to dry and drew random lines for branches across all my nails.  Using the toothpick I dotted the Wall Street pink color into a box shape with 4 dots.  I wanted to make them with 5 dots and wing them out to make actual cherry blossoms, but the dots came out bigger than expected so I just kept them as is.  Once adding the flowers, I added some random white dots all over the nail.
I was very happy to show these off at the SF Cherry Blossom festival and yes I'm still rocking these nails today.  I've had these on for about 5 days now and the polish is still holding up.  I'm very surprised and am considering buying some more NYC In a New York Minute polishes when I get a chance to.  On their website they have this very pretty turquoise color that I want a get a chance to see in person, and also a red and white.

Note:  You like how I take these pictures before I clean up the sides? Haha

NOTW: 2011-04-03

Nail of the Week
April 3, 2011
(I know the dates aren't showing up literally weekly, but I use the date when I either do them or when I upload the pictures from my camera)


Wanted some spring inspired nails and since I bought these new nail art pearls/beads specially for a spring nail, I decided to just go with it with this design.  I didn't really have a game plan, but they turned out better than I expected.


What I used:
- China Glaze 867 Re-fresh Mint
- Nailene French Manicure
- "Nail Accessory" Pearls from Daiso Japan

Used Re-fresh mint on the thumb and ring finger and painted the rest o them white.  Instead of doing a french tip inspired manicure, I did a moon mani inspired nail set instead.

After the nails had dried, I took a clear polish and painted it only over the moon parts of the nail and started adding pearls in the moon shape.  The thumb and ring nails are in a traditional moon while the others are actually tilted a couple degrees.  I used 4 different colors: yellow on the green nails (of course), blue, green and pink.


I was satisfied with the way they turned out, but I didn't like them enough to keep them more than a week.

When I saw these in Daiso, I just had to get them (along with another nail art kit which I'll show some other time).  Having the ability to buy inexpensive nail art just made me jump to get them without hesitation.  I spent a good chunk of time in that section of the store trying to decide what I should get.  They were only a  $1.50 and the quality is pretty awesome.  A couple of them fell off after being snagged in my hair (my hair ate them) when I was showering but that was the only problem I had with them which wasn't the pearls fault, it was mainly the top coat I used to secure them.

Daiso has really great inexpensive stuff.  It's a great "dollar" store to buy pretty much anything you want and I certainly tend to buy something everytime I leave the store and the beauty stuff is a great steal (I just recently bought false eyelashes which I'll review when I get to try them).


NOTW: 2011-03-26

Nail of the Week
March 26, 2011
(I know the dates aren't showing up literally weekly, but I use the date when I either do them or when I upload the pictures from my camera)

*Note: I skipped nail art on March 18 to let my nails breathe a bit

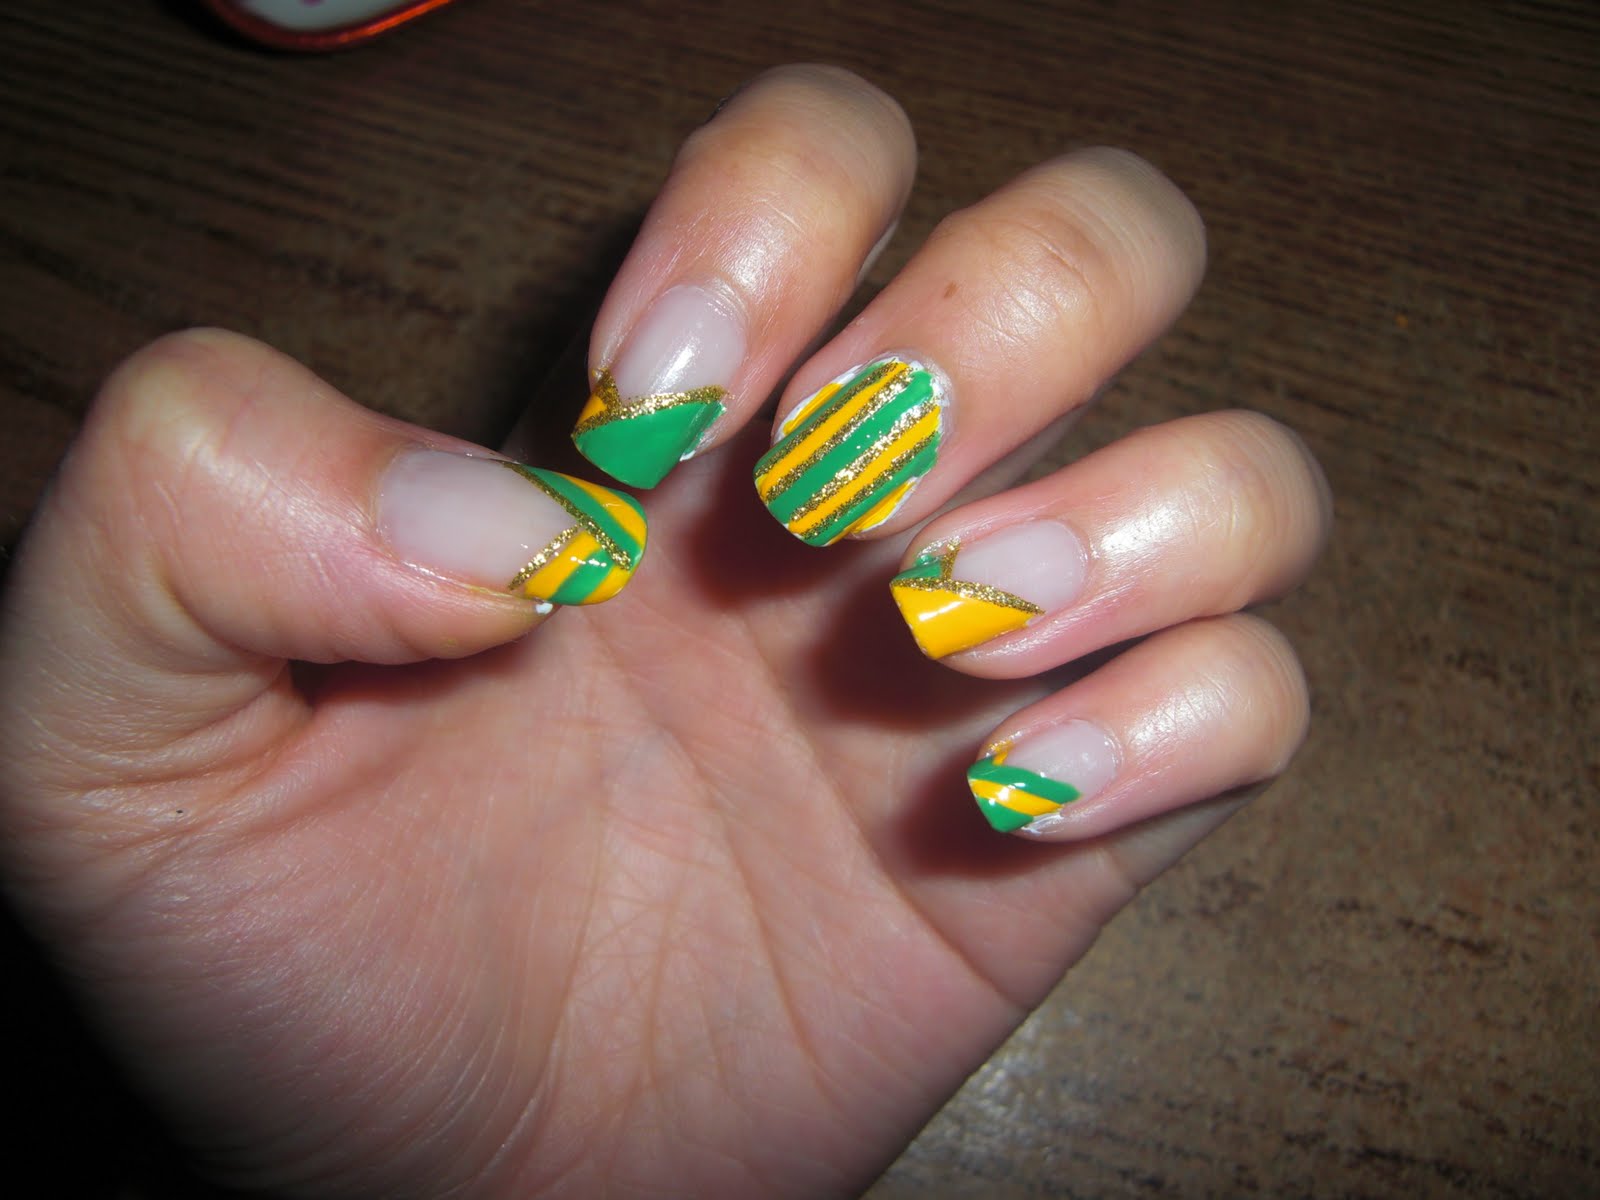
These nails were inspired for my favorite baseball team, the Oakland Athletics.  The new season was starting so I decided to add to my A's gear by incorporating my nails as well.


What I used:
- Milani Nail Art (with precision brush) in Art of Gold
- Milani Nail Art (with precision brush) in Yellow Design
- Milani Nail Art (with precision brush) in Green Sketch
- Nailene French Manicure (base color polish and acrylic strong top coat)
 
I was happy to get a chance to use the Yellow and Green polishes that I had got from Target in February.  Once it hit the week of opening day games, I decided to paint my nails.  Because the green is pale in comparison to the teams actual green color, I decided against doing what I originally planned which I'll leave as a surprise until I get the actual color I want.  I was a little hesitant to use the yellow at first, but the yellow color is actually really close to the new yellow (or gold) color jerseys the A's are wearing this season.

Okay, let's get down to it.  I painted my thumb first just to test out the colors and I loved the way it looked, until I stared at it too long and realized what it reminded me of:
 It reminded me of a volleyball
Yeah I know, what?! But really, it reminded me of a volleyball, but decided to keep going and painted the rest of my nails.  When I was done I wasn't as happy with it as I should have been and removed it a day later.  They didn't even get to be showcased during the Giants vs. A's exhibition.  I couldn't stand looking at them and not because it reminded me of a volleyball, I just didn't like the way it looked and it's mainly because of the green color.

The Milani yellow and green stripers were a great addition to my collection, I just wish that the green was darker.  The green will have great use for the spring and summer when I start designing flower art, we'll see how I'll be able to incorporate these colors in the future.

NOTW: 2011-03-03

Nail of the Week
March 3, 2011
(I know the dates aren't showing up literally weekly, but I use the date when I either do them or when I upload the pictures from my camera)

*Note: I skipped nail art on February 24.

I did these nails before my sister's birthday dinner.  No real inspiration, just thought I'd have fun with it since I really wanted to use these colors.


What I used:
- China Glaze 867 Re-fresh Mint
- China Glaze 550 Aqua Baby
- Milani Nail Art (with precision brush) in Art of Silver
- Nailene French Manicure
- Toothpicks

After doing the basics of a base coat and base color, i painted my middle nail completely white.  It took about 3 or 4 coats to get it completely white and because There were many layers, it became a pain for it to dry (not to self: invest in a white polish NOT meant for the tips) and since it was thick, when the surface dried, the middle was still soft.

I painted the tips asymmetrically (like always), but alternated colors.  the index and ring are painted solid of either Re-Fresh Mint or Aqua Baby.  The pinky and thumb are swiped one way with each of the colors.  Using a toothpick, I dotted the color in a straight line on the middle nail.  I used the silver striper to line the "smile line" of the tips.

I really liked these nails, but I also didn't paint them neatly so they didn't look as nice as I had hoped.  I really love the combination of the 2 colors, which is probably why I was so drawn to these 2 colors in the first place when I purchased them. 

Sunday, February 6, 2011

NOTW: 2011-01-29

Nail of the Week
January 29, 2011
(I know the dates aren't showing up literally weekly, but I use the date when I either do them or when I upload the pictures from my camera)


I wanted to try out one of the new polishes I bought and decided to use the re-fresh mint color first.  It really stood out to me from the beginning, so I couldn't wait to try it!


What I used:
- China Glaze 867 Re-fresh Mint
- Milani Nail Art (with precision brush) in Black Sketch
- Nailene French Manicure (base color polish and acrylic strong top coat)
- Nailene Nail Guides
- Nailene Bedazzle Nail Art

Like always, base coat then base color.  I used 2 coats of the base color this time and after allowing it to dry i used the Nailene nail guides to design an asymmetrical tip nail.  I Painted the tips accordingly with two coats of the China Glaze polish  and allowed to dry.
Peeling off the guides became a problem.  The base coat started peeling off 4 of my nails as I removed the guides, but luckily I was able to touch it up without starting all over.  After the touch-up, i added a black outline and added some nail decals to the middle nail and the thumb.  Also added 2 coats of the Nailene top coat. 

Originally, I intended to keep the nail as is with just the green and that's it which is why I used the guides for a clean tip, but I thought the color was a little faint to just keep it as is and added the black line.

(picture right after it was done, not touched up yet)

 (Left: without cleaning up the side of nails, Right: After cleaning up*)
*sorry about the light, i used the backlight function instead of flash.

I really liked the color when it was on my nails.  It actually looks like the color straight out of the bottle, which doesn't happen all the time.  I also like how this particular color doesn't have a shimmer to it, so it gives a nice smoothness to it.  What also wasn't intentional was that the color of the polish actually matched my hoodie when I was doing my nails.  it didn't hit me until I started taking pictures and caught my sleeve on camera.

These lasted for the week and I could tell could have lasted longer. 
Upon removing the polish, I had no problems until it came to removing the decals, which I have stated before that they are hard to remove.  I used the foil and cotton ball method to removing it, they dissolved enough to "peel" off the decal, but that also meant I still had to clean up the polish underneath as well.

Friday, January 28, 2011

NOTW: 2011-01-21

Nail of the Week
January 21, 2011

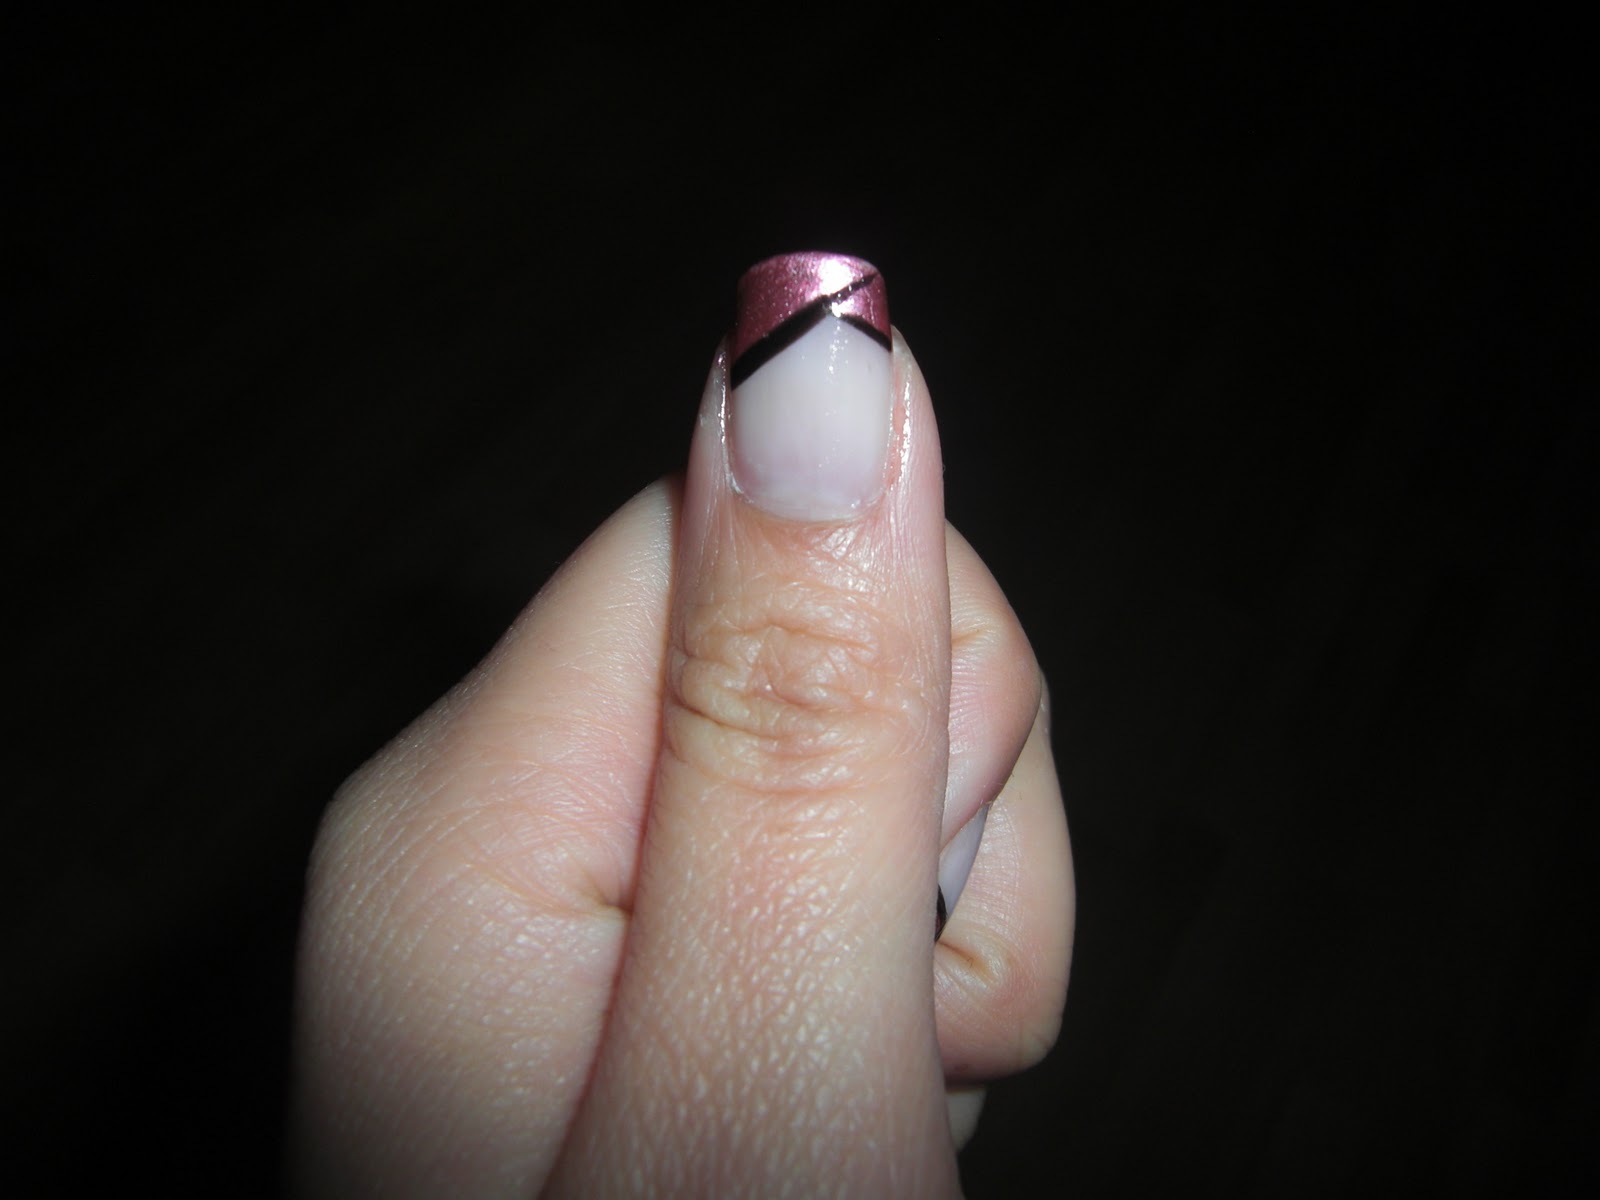
Since it's the first week of school, I wanted something fun to try with my nails.  I ended up doing an asymmetrical french tip nail using the China Glaze polish I bought a couple weeks ago.

What I used:
- China Glaze 689 Emotion
- Milani Nail Art (with precision brush) in Black Sketch
- Nailene French Manicure (base color polish and acrylic strong top coat)
 
I did a base coat and the base color polish the night before doing the tips (which was probably a bad idea).  The next day when adding the color, I took the China Glaze polish and did a high slope swipe on one side of the nail and did a short slope swipe on the other side of the nail.  When dried, I added a black lining to the tips.  For the high slop, i made the lining pass the intersection and on the other side, i made the line touch the other.  And of course add a top coat when dried.

 The nails turned out fine until i put on the top coat.  I guess I didnt wait long enough for the black polish to dry because it actually bled and smeared when I put it on (which happens).  Something that I would have changed was to make the high sloping side thicker, which I'll try again with a different polish (I already have an idea in my mind).

I was debating about returning the "Emotion" color because I didnt like the way it looked on my nails when I applied it to the whole nail.  But as I've stated before, I'm not a big fan of painting the whole nail.  When I tested out putting it on the tips, I really liked the color after all and I love how it's shimmery.

I was a bit disappointed with the polish itself, but it was particularly my own fault.  I only applied one coat, which, when painted, looked good enough.  There was no streaking, it was not opaque, it actually looked fine.  However, the polish started to rub off after a day or two, so I had to do touch ups.

The mistake I made was applying the base polish coat the night before.  Being without the top coat and dealing with everyday business, ended up making it peel within a couple days after I DID apply the polish.  I'm not sure if that makes sense, but lets just say, it started peeling really badly.

Tuesday, January 18, 2011

Wedding Nails (mini-review)

Finally, I'm putting up the pictures of the nails i did for my sister's wedding.  I mentioned that this were to be a tutorial, but in the midst of decorating and painting, I just forget to take pictures step by step, so you'll see what I've done here and there, but its not really a tutorial, it's more of a "what i've done over time" picspam.  

I need to mention that I am (or was) fairly new to using the nail art brushes, which is why the designs came out sloppily, but removing the polish to start over also cannot be done as it'll ruin the nails itself.

Here I used:
- Milani Nail Art (with precision brush) in Black Sketch, White Canvas and Art of Gold
- Nailene Nail Studio in Burgundy/Maroon

 
Milani Nail Art polishes (with Art of Silver included)

Nails placed (in order) on a nail stand

  
Paint the thumb and ring finger nails white

        
The inspiration for the nail design are the flowers on the right which is the wedding print

I really liked my first attempt at nail designing this way, however, it could have been done better.  But with a little practice, it'll get better.

I might as well make this a mini-review since I wont be coming back to this anytime soon.
I was really happy that the Nailene Nail Studio nails came in that color.  It was just a coincidence that they matched the color scheme to my sister's wedding.  The only problem I had with it was that the color was a bit faded, it didn't have that shine that nail polish typically had.  I'm not a big fan of painting my whole nail (I stand by french manicures!), which is why I ended up painting them up with the design of the wedding.

This was the first time I got a chance to use the Milani Nail Art polishes and I LOVE them.  The brushes are very thin and long so you can make nice 'swishy' strokes, but because the brushes were long, it was difficult for me to draw the flowers on.

When it was time to put them on, it was the worst experience I've had with artificial nails. I put these on the night before the wedding.  They were perfectly fine when I went to bed, but when I woke up I was already missing one.  Luckily for me, it was still in my bed.  So I applied the glue on once more, next thing you know, a different nail pops off.  Also, another and so on and so on throughout the day.  It was horrible.  I only ended up wearing these for that day, and that was it.

It might be the fact that the nails fit rather oddly to my nail bed as opposed to the Nailene So Real nail set.  Overall, the Nailene Nail Studio nails I don't think I'll ever try again, but I'll be getting the Milani nail art polishes again and hopefully in the other colors as well

Saturday, September 4, 2010

Review: Nailene Bedazzle Nail Art

I LOVE Nail decals.  When you're in a hurry and don't have the time to free-hand nail art to your nails, decals/stickers add that special touch for you.  Effortless, easy-to-use and add fun or even elegance to your nails.  I was extremely excited to see the Bedazzle Nail Art pack to my prize bag because I was needing some new ones.  The nail stickers that I usually get are ridiculously expensive just for ONE set of decals (that's what you get for buying imports from Japan!).  In this pack you get FOUR sets of decals and what was lucky for me was that the designs included are totally me (im a huge sucker for stars!).


What I loved about these decals is that they were easy to peel off the backing, yet were strong enough to stick to my nails without sliding around or ripping off.  Previous stickers I'd use would actually slide off my nails without me knowing, so when I'd look at them I'd see the outline of where they were or have lint stick to where it used to be haha.

What I didn't like was when you're removing your polish, the decals don't come off with it.  Now when I said these were strong enough to stick to my nails without falling off, i mean it.  These suckers held on for dear life.

 As you can see, I have NO polish on what-so-ever, yet these things stuck on without even a scratch on them.  I mean, it was cool that I was able to keep them on just for a bit longer even after my polish chipped, but I was ready to get them off, and they just wouldn't come off.

They eventually started coming off a week later, but I'm not sure if it fell off because of the amphyl I used during biology lab or if they fell off on their own.  Either way, they fell off basically and you can definitely tell where they were on my nails because of the left over polish behind it.

I really liked these decals/stickers because they were strong enough to stay on my nails and have these great designs.  I just wish they were soluble in acetone.

Wednesday, August 25, 2010

Review: Nailene French Manicure kit

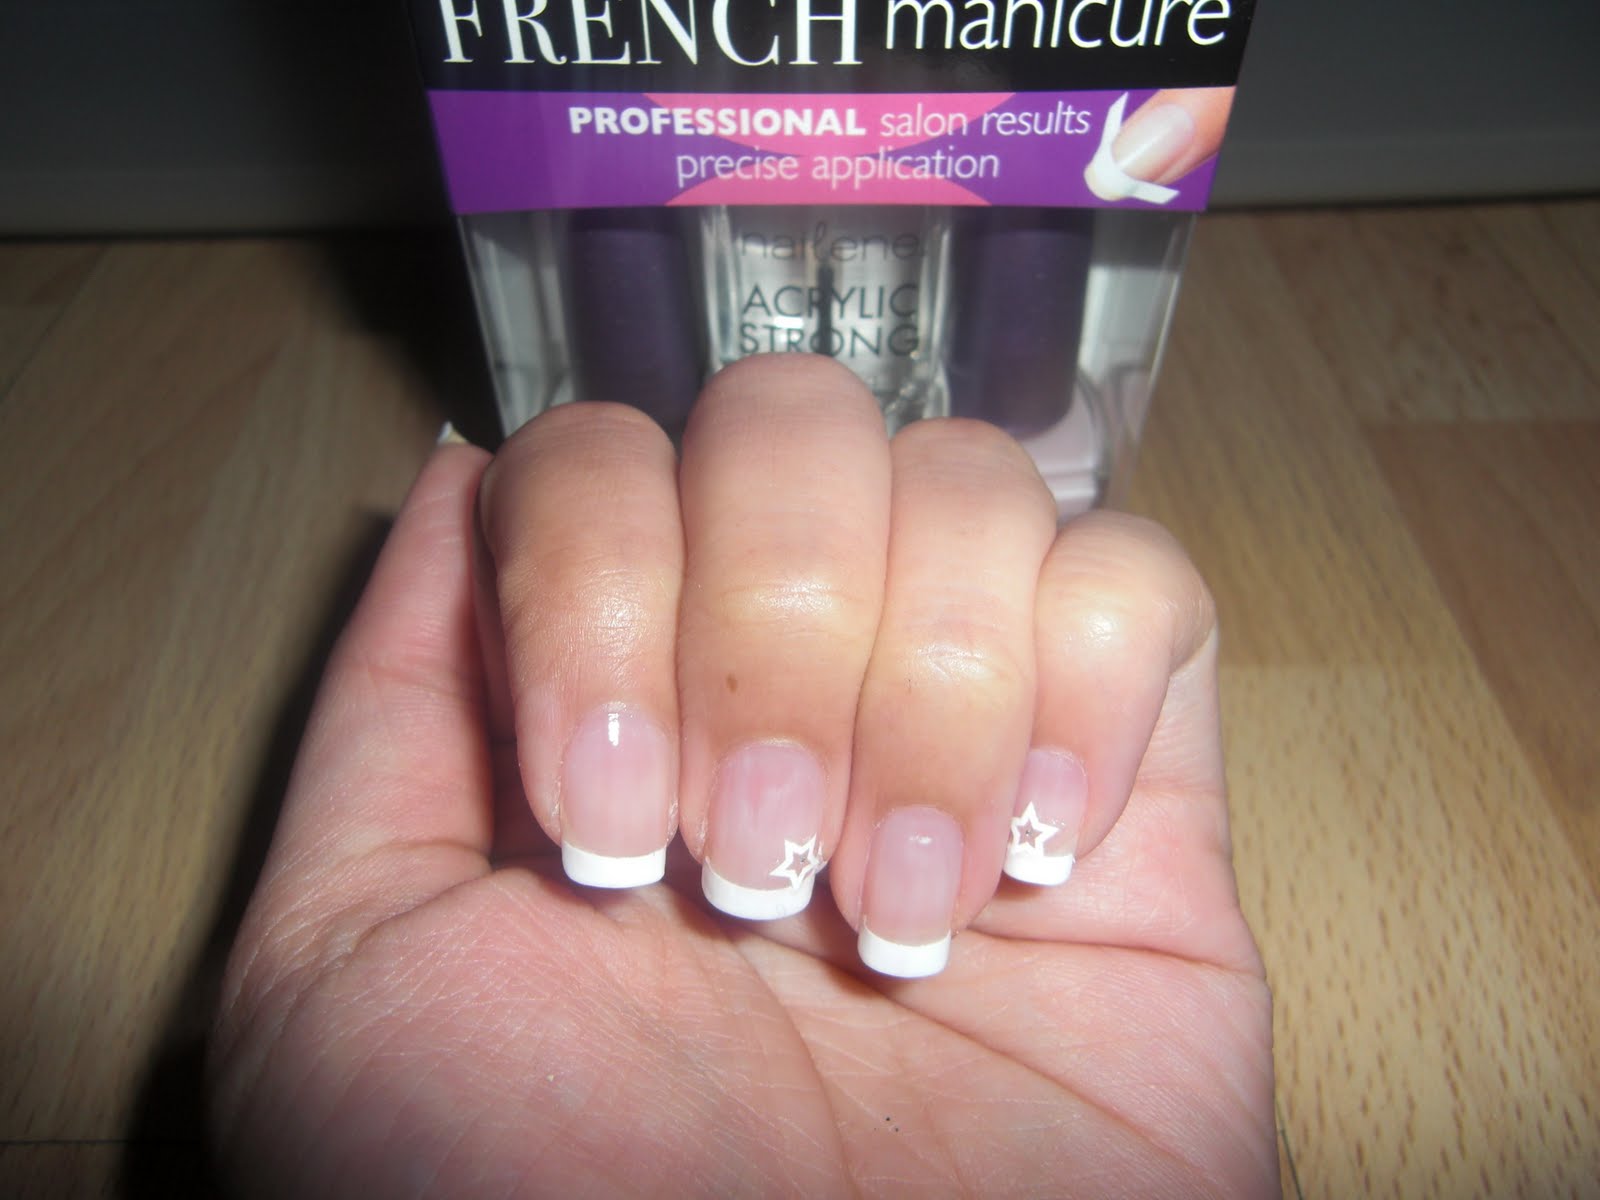
The first Nailene (http://www.nailene.com) product that I used from the prizes that I won was the Nailene French Manicure kit.  I was so excited to use this product first because I'm a huge fan of french manicure style nails.  This is typically the only way I do my nails so getting this was like a dream (haha).


Starting off with clean, groomed nails, I added the nail guides provided in the kit.  Typically I don't use the nail guides and just free-hand the tips because of past experiences using the guides from the Sally Hansen French Manicure kits, which I hated.

Unlike the Sally Hansen guides, which never gave me a clean line even after minutes of drying (it always bled through the guide), the Nailene guides gave me a SUPER clean nail tip which I couldn't believe.  It seriously looked like my tips were fake.

For the polish, I wasn't a big fan of the brush in the white polish.  I'm not sure if it was just me painting it on really badly, or the brush itself.  But I found myself struggling to use it or to keep dipping it back into the polish.

What I did like was the base color that came with the kit.  I was a bit scared to use it since the bottle looked really pink, but when I brushed it on, it came out with a nice opaque color that did not over power on my nails.

The acrylic top coat that came in the kit was the best part.  None of the top coats I've used had a lasting effect on my nails.  They'd either start chipping off the polish in HUGE chunks within a day or two.  With this top coat, It actually made the polish last at least a week with little or no wear.
Even with the constant rustling through my purse and luggage during vacation, I was still able to maintain this look without any great damage.


Adding a touch of the nail art stickers (which I will review next), I've created a look that I was very satisfied and happy with.  I'd definitely recommend the Nailene French Manicure kit to anyone who's looking for a quick and easy (and inexpensive) French manicure that you can do in the privacy of your own house.